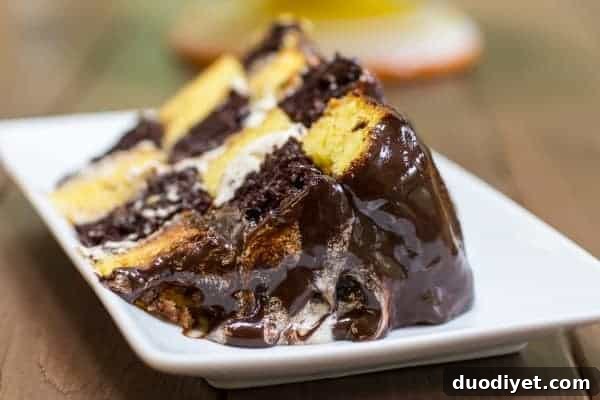
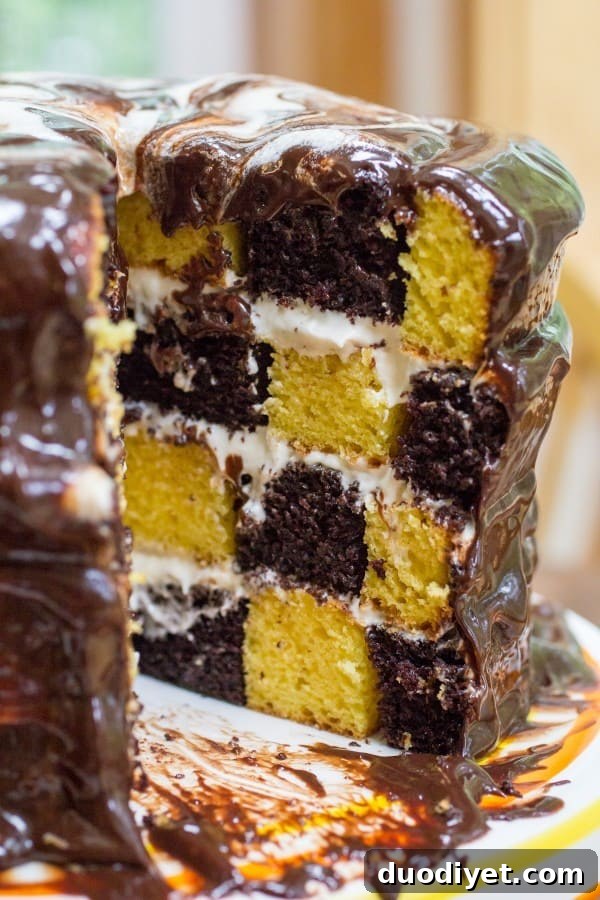
Checkerboard Marble Cake is a playful, crowd-pleasing dessert for anyone who can’t choose between chocolate and vanilla.
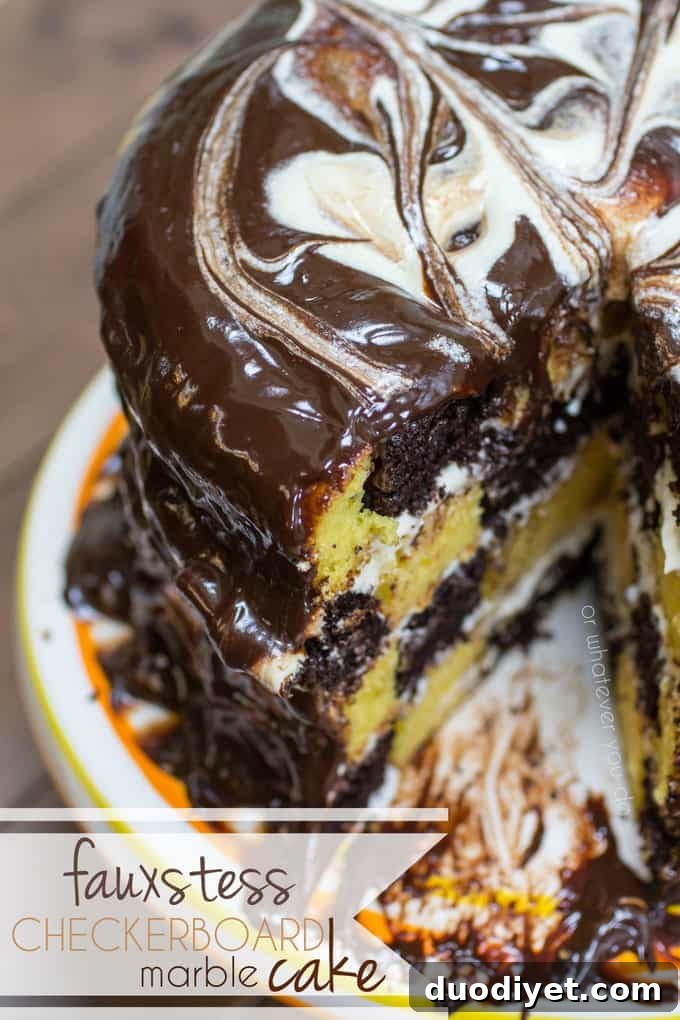
Checkerboard Marble Cake
Last weekend I caught the baking bug and spent the day in the kitchen making a variety of treats. One thing I’d been eager to try was a checkerboard cake—a fun design that alternates rings of chocolate and yellow cake to create a striking pattern when sliced. The technique looks complicated in videos, but it’s surprisingly straightforward and very rewarding.
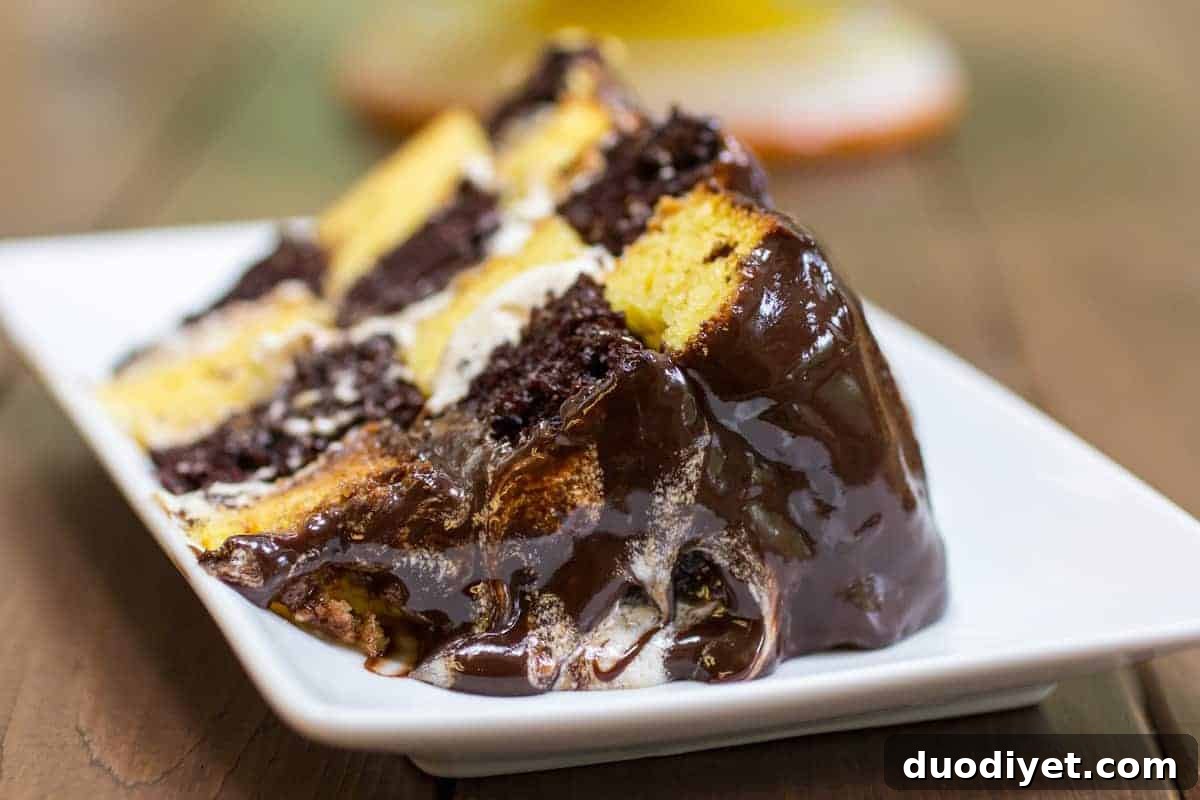
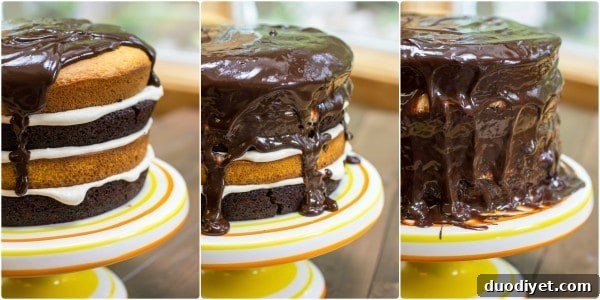
A family favorite had been hinting it was time for a new dessert, and a checkerboard marble cake seemed like the perfect choice. The cake I made is layered with a sweet marshmallow-cream filling that mimics the classic Hostess cupcake center, and it’s finished with a glossy, rich chocolate ganache. The combination is irresistible for anyone who loves both chocolate and vanilla flavors.
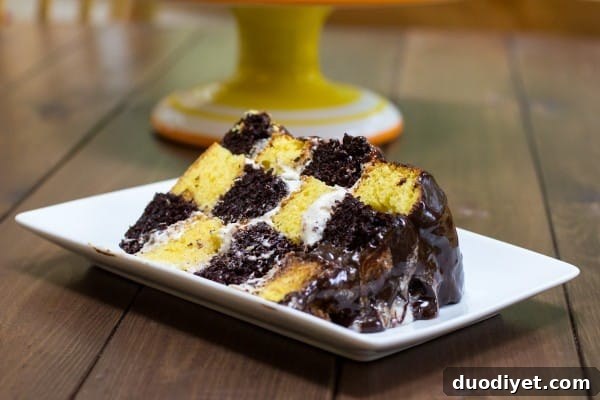
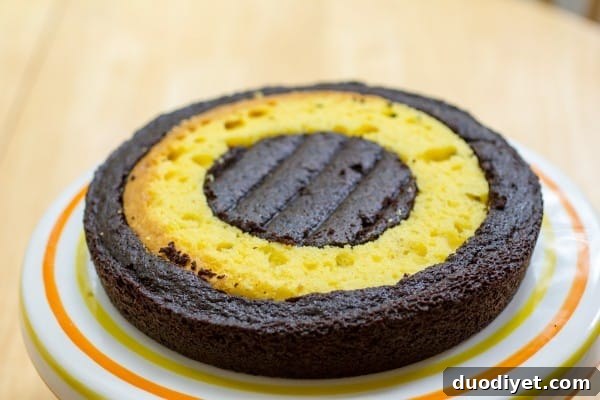
Creating the checkerboard pattern is mostly about cutting and reassembling rounds. Bake full 8-inch rounds in two flavors, then cut concentric circles from each layer and nest them together in alternating colors before stacking. It’s an easy technique that produces an impressive result.
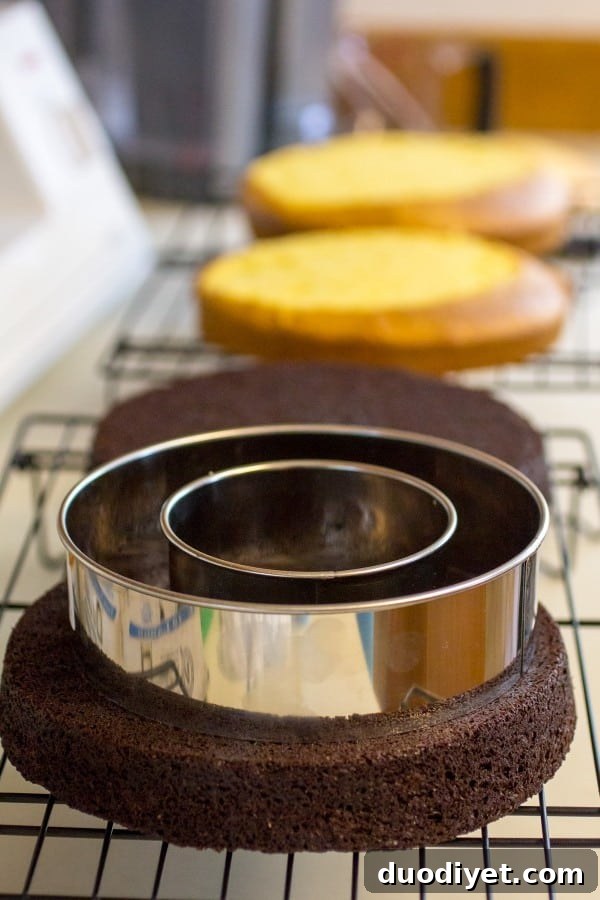
I used a set of circle cutters to trim the cake layers precisely. A larger cutter for the outer ring and a smaller cutter for the center hole make the process faster and more consistent. After trimming, assemble alternating rings—chocolate, yellow, chocolate, yellow—until you have stacked layers that create the checkerboard effect when sliced.
Once the layers are nested, spread the marshmallow-style filling between each layer. Pipe the filling into the rings so you avoid dragging crumbs into the filling—this keeps the edges clean. I recommend dividing the filling into thirds and using one portion between each layer for even coverage.
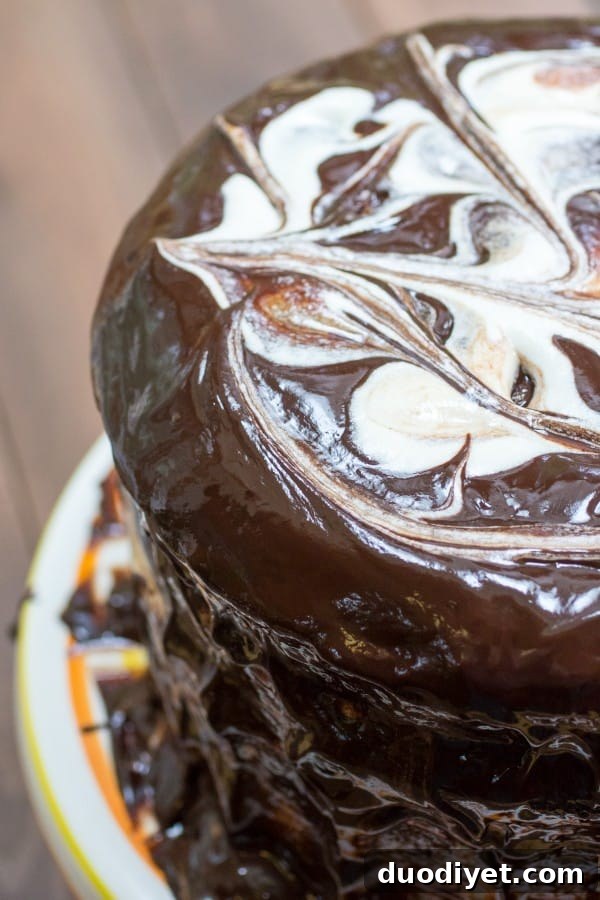
After stacking, pour a warm ganache over the top. The ganache is simply melted chocolate combined with heated cream and a touch of butter and vanilla—stir until smooth and glossy, then let it flow down the sides to coat the cake. To finish, make small dollops of a pale icing on top and gently drag a knife through the chocolate and icing to create a soft marbled decoration.
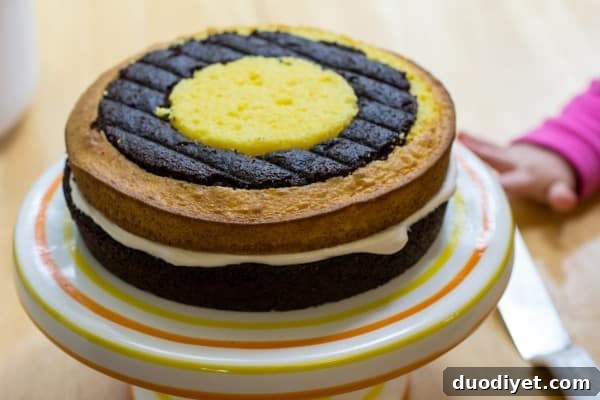
The whole process moves quickly once the components are baked and cooled. If you have little helpers, watch out—they’ll try to sample the filling and crumbs at every stage!
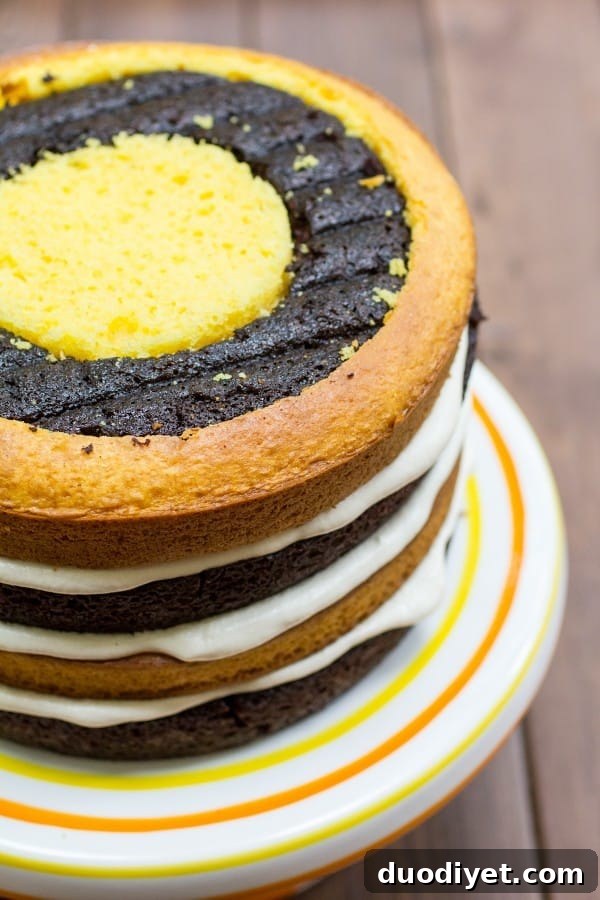
Tips for Checkerboard Cakes
- Use circle cutters for consistent rings. A larger cutter for the outer ring and a smaller cutter for the center make reassembly easy.
- Cool the cake layers completely before cutting to reduce crumbling. If you want a firmer structure, chill the stacked cake for 20–30 minutes before pouring ganache.
- When filling the rings, pipe the filling rather than spreading it. A piped line across each ring minimizes crumbs in the filling and helps keep clean edges.
- Allow the ganache to set a bit in the fridge if you prefer neater slices. Slicing a very warm or just-cooled cake can smear the checkerboard effect.
- Be careful when cutting and serving to preserve the pattern—use a sharp, long knife and wipe it clean between cuts.
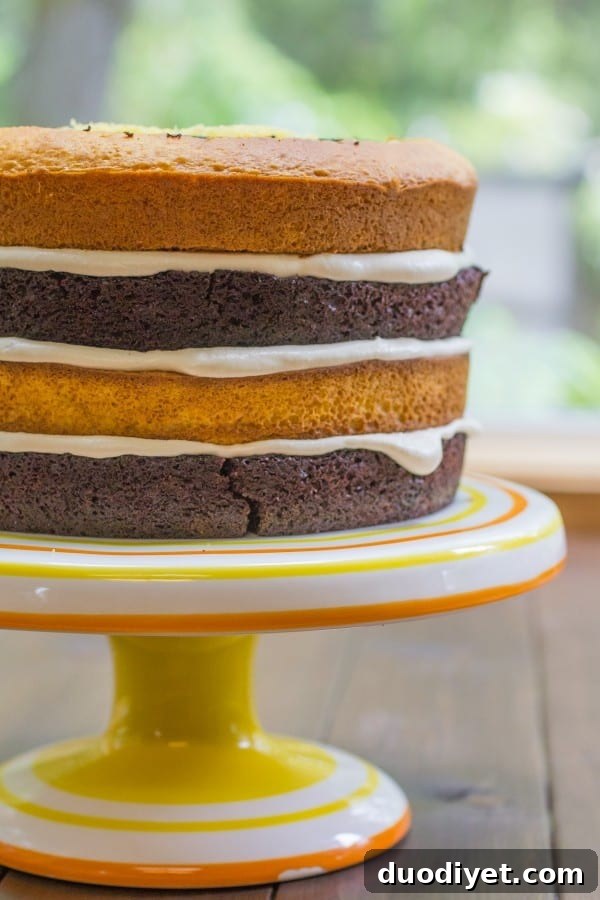
Checkerboard Marble Cake
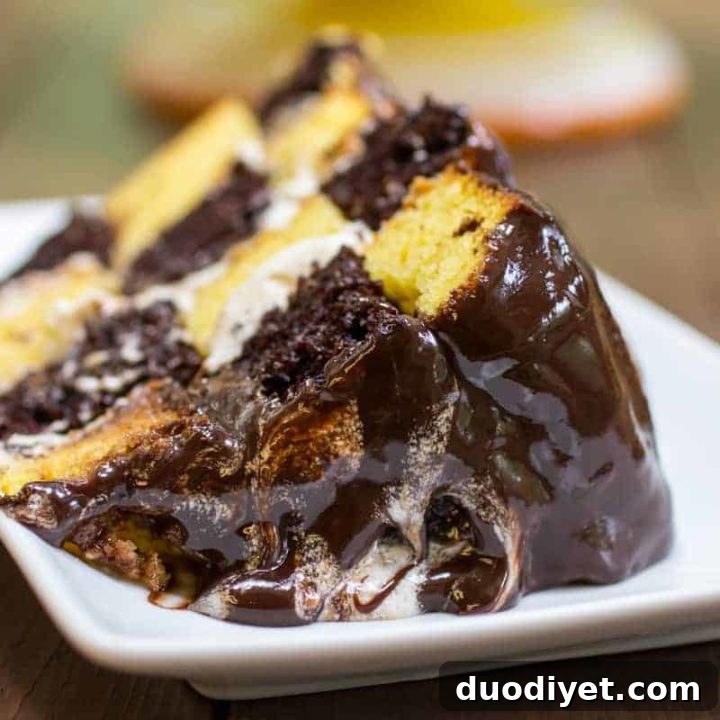
A marble-style checkerboard cake with chocolate and yellow cake rings, a marshmallow-style filling, and a glossy chocolate ganache. This cake makes a striking presentation and tastes rich and balanced.
Ingredients
Chocolate Cake Layers
- 1 cup cake flour
- ½ teaspoon salt
- ½ teaspoon baking powder
- 1 teaspoon baking soda
- 6 tablespoons cocoa powder
- 1 cup sugar
- ½ cup canola oil
- ½ cup hot strong coffee
- ½ cup whole milk
- 1 large egg
- 1 teaspoon vanilla
Yellow Cake Layers
- 1 boxed yellow cake mix (no pudding)
- 4 large eggs
- 1 cup milk
- ½ cup canola oil
Filling
- ½ cup butter
- 2 cups powdered sugar
- 2 tablespoons vanilla
- 6 tablespoons heavy cream
- 2 cups marshmallow cream
Ganache
- 2 cups milk chocolate chips
- 1 cup heavy cream
- 2 tablespoons butter
- 1 tablespoon vanilla
Icing
- 4 tablespoons butter
- 1–2 tablespoons milk
- 1 cup powdered sugar
- Dash of vanilla
Instructions
- Preheat the oven to 350°F (175°C). Prepare four 8-inch cake pans by spraying lightly with baking spray and lining each bottom with a parchment circle.
- Make the chocolate cake batter: combine all chocolate cake ingredients and beat on medium for 2–3 minutes until smooth. Divide into prepared pans, tap to release air bubbles, and bake 25–30 minutes or until a toothpick shows moist crumbs.
- Make the yellow cake batter: combine the boxed cake mix, eggs, milk, and oil and beat on medium for about 3 minutes. Pour into prepared pans and bake 25–30 minutes or until a tester shows moist crumbs.
- Cool all cake layers completely. Using two circle cutters (a larger and a smaller), cut two concentric circles from each cake and reassemble rings in alternating colors to create the checkerboard pattern.
- Prepare the filling: place all filling ingredients in a mixing bowl and beat on high for several minutes until smooth and fluffy, scraping the bowl as needed.
- Place one-third of the filling between each stacked layer, piping it into the rings to avoid crumbs. Continue stacking until all layers are assembled.
- Make the ganache: warm the cream with butter and vanilla until simmering, pour over the chocolate chips, and stir until melted and glossy. Let cool briefly, then pour over the cake and spread to cover the top and sides.
- Mix the icing ingredients until smooth and place small dollops on top of the cake. Use a butter knife to gently drag through the chocolate and icing to create a marbled pattern on the surface.
Nutrition Information (estimate)
Yield: 12 servings · Serving Size: 1
Calories: 1029 · Total Fat: 55g · Saturated Fat: 23g · Sodium: 720mg · Carbohydrates: 125g · Protein: 10g
Nutrition data is an estimate. For medical or dietary guidance, consult a trusted nutrition source.
If you try this checkerboard marble cake, it’s a great conversation piece and a fun project for a weekend baking session. Chilling briefly before serving can help the slices hold their pattern, but serving slightly warm also has its own charm—choose the texture you prefer. Either way, the alternating flavors and the glossy finish make this cake memorable.